Steppers & Homing
Endstops
Before the printer homes, all the switches need to be in the open position. Otherwise, your printer may not home correctly or could crash into the frame.
Microswitches
Use the QUERY_ENDSTOPS command to see the real-time status of the endstops.On the console, you should see the following output:
x:open y:open z:open
To check if the endstops are working, manually press the microswitches and run the QUERY_ENDSTOPS command again. The output should change according to the endstop you pressed. For example, if you press the X-axis endstop, the output should show:
x:TRIGGERED y:open z:open
Cartographer & Beacon Calibrate
Probes like the Beacon and Cartographer have their own calibration scripts. You need to use these scripts to calibrate the Z probe. Here’s how you can do it:
- Home your printer in X and Y:
G28 X Y
- Move your toolhead to center of the bed:
  G0 X117.500 Y117.500
  #These XY positions are for the Crossant.
Start the calibration process:
Cartographer:
CARTOGRAPHER_CALIBRATEBeacon:
BEACON_CALIBRATESave the model:
SAVE_CONFIG
- Check the accuracy of your probe:
PROBE_ACCURACY
- Output should look like this:
  probe accuracy results: maximum 2.004492, minimum 2.001753, range 0.002739, average 2.003370, median 2.003433, standard deviation 0.000493
  probe at 117.500,117.500,2.000 is z=1.995508
  probe at 117.500,117.500,2.000 is z=1.996307
  probe at 117.500,117.500,2.000 is z=1.996325
  probe at 117.500,117.500,2.000 is z=1.996318
  probe at 117.500,117.500,2.000 is z=1.996489
  probe at 117.500,117.500,2.000 is z=1.996671
  probe at 117.500,117.500,2.000 is z=1.996646
  probe at 117.500,117.500,2.000 is z=1.997123
  probe at 117.500,117.500,2.000 is z=1.996671
  probe at 117.500,117.500,2.000 is z=1.998247
  PROBE_ACCURACY at X:117.500 Y:117.500 Z:10.000 (samples=10 retract=0.000 speed=40.0 lift_speed=10.0)
Klicky Probea
TBD
Stepper Motors
First, to ensure all the stepper motors are working correctly, you can use Klipper's stepper buzz feature. The
STEPPER_BUZZcommand moves the specified stepper motor 1mm in the positive direction and then back to the original position. Here's how you can do it:
- Run those commands one by one:
#For X steppers
STEPPER_BUZZ STEPPER=stepper_x
STEPPER_BUZZ STEPPER=stepper_x1
#For Y steppers
STEPPER_BUZZ STEPPER=stepper_y
STEPPER_BUZZ STEPPER=stepper_y1
#For Z steppers
STEPPER_BUZZ STEPPER=stepper_z
STEPPER_BUZZ STEPPER=stepper_z1
STEPPER_BUZZ STEPPER=stepper_z2
Stepper Directions
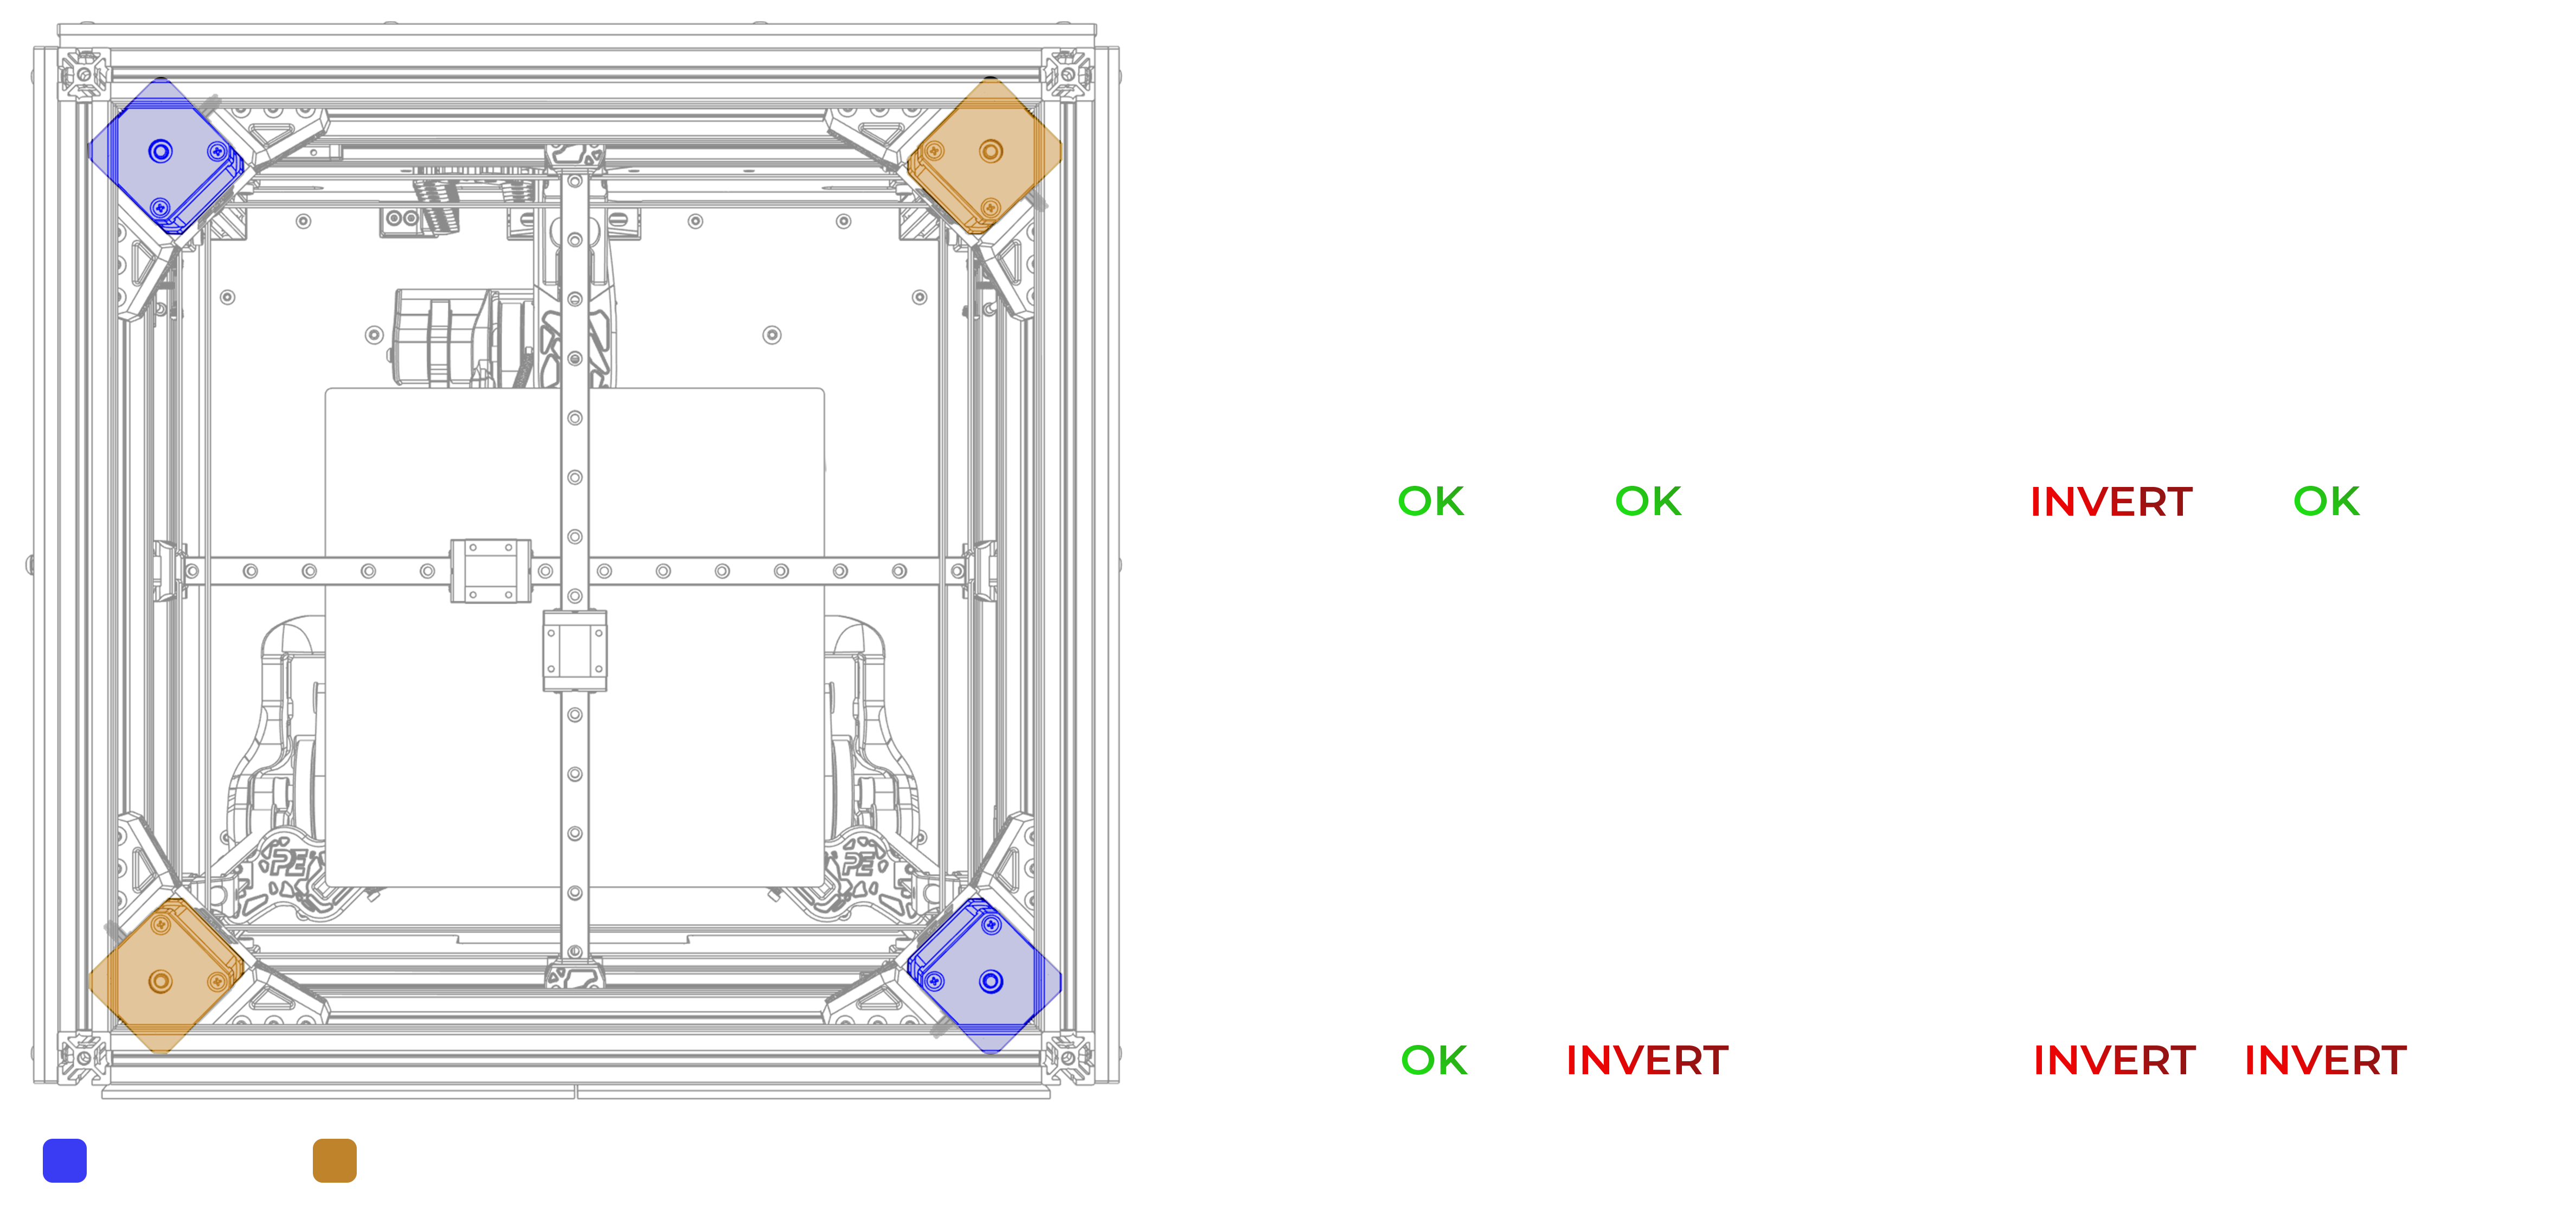
When you home the printer, the X-axis should move to the right, and the Y-axis should move to the back. If either axis moves in the opposite direction, you need to invert the direction pin in the configuration file
[stepper_x]
step_pin: PE2
dir_pin: !PE3 # Add or remove the (!) before the direction pin to change steppers direction
enable_pin: !PD4
microsteps: 16
rotation_distance: 40
endstop_pin: PG9
If the motors on any axis are turning in opposite directions, you need to invert the direction of one of the motors. You can do this by either changing the direction in the configuration file or reversing the JST connector.

Homing Directions
To ensure your printer homes correctly, compare the homing positions with the list below and make the necessary adjustments in the
printer.cfg
Z Steppers
Defining the Steppers
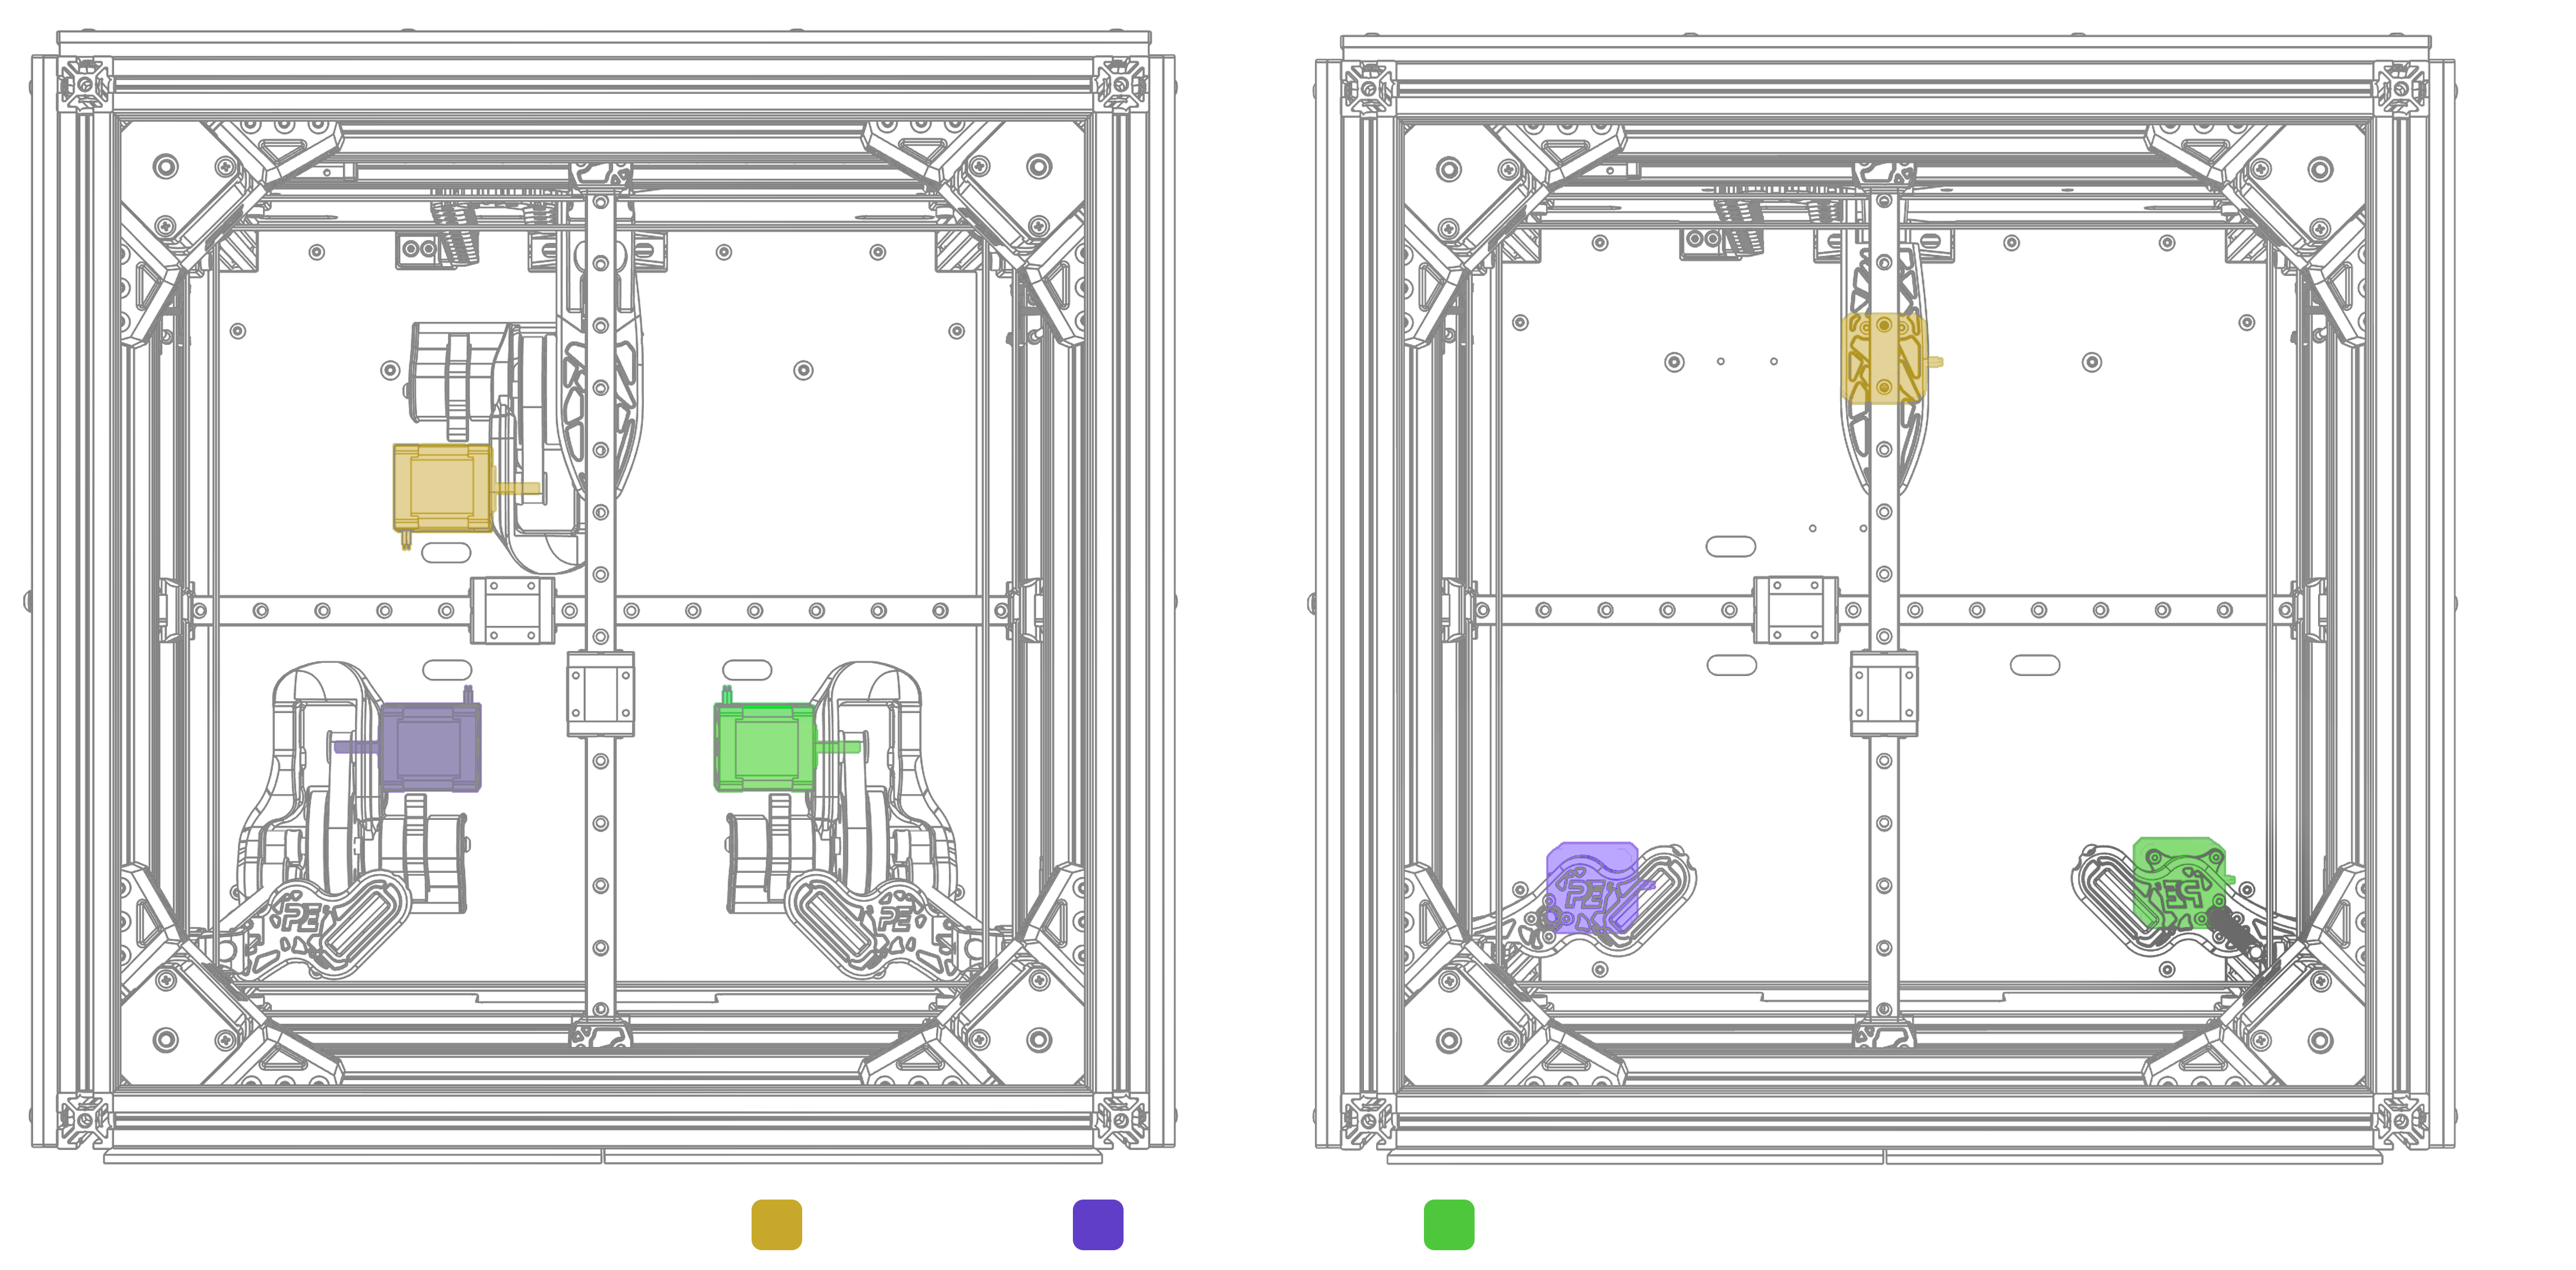
For the Z tilt macros to work correctly, the motors must be properly defined in the configuration. On the Crossant, the rear motor is (Z), front left is (Z1) and front right one is (Z2). Use the
STEPPER_BUZZcommand to identify which motor is which and correct any errors in the configuration file if needed.
Z Tilt
With the triple Z system used in the Crossant, you can automatically level the bed using the Z tilt command.
When performing Z tilt calibration, the toolhead will take a specified number of samples from the designated points and attempt to achieve the tolerance value indicated in the configuration.
- Level the bed by:
Z_TILT_CALIBRATE